-
 Tel:
Tel:+86-15996094444
-
 E-mail:
rose@aozjs.com
INQUIRE NOW

+86-15996094444

rose@aozjs.com
INQUIRE NOW
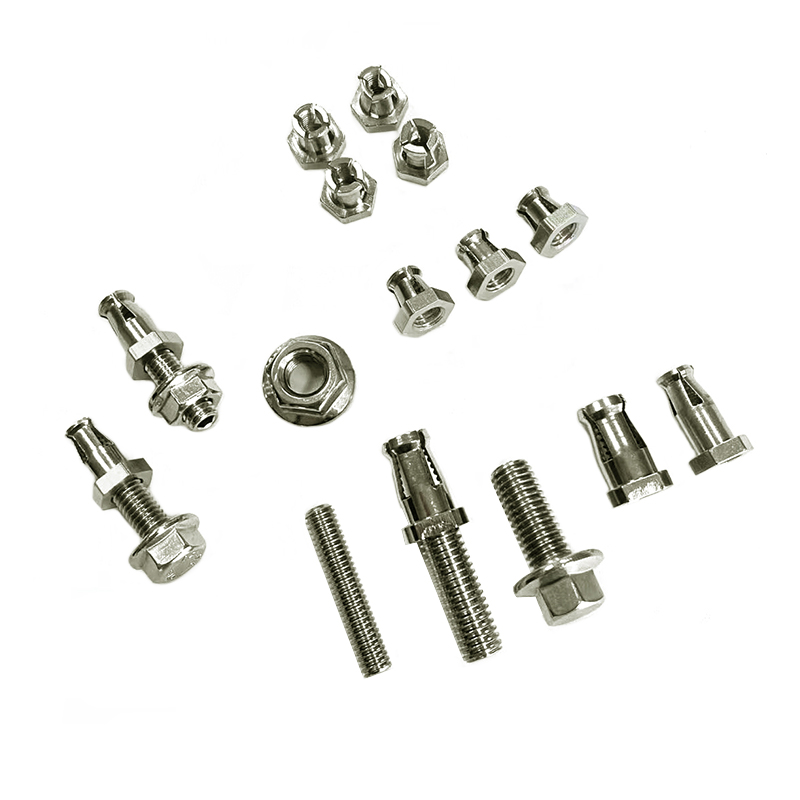
When installing a screw-in inverted cone anchor bolt, ensuring that the screw-in depth and angle meet the design requirements is the key to ensuring the anchor bolt's bearing capacity and structural safety. The following are specific installation steps and precautions to ensure installation quality:

1. Familiar with the design requirements and product instructions
Design requirements: Before installation, carefully read the design documents to clarify the anchor bolt model, screw-in depth, installation angle, and bearing capacity requirements.
Product instructions: Familiar with the product instructions of the screw-in inverted cone anchor bolt, and understand its installation steps, scope of application, substrate requirements, and precautions.
2. Use appropriate tools and equipment
Special tools: Screw-in inverted cone anchor bolts usually require the use of special installation tools such as electric screwdrivers, torque wrenches, or manual screw-in tools. These tools can ensure that the screw-in force is uniform and meets the requirements.
Measuring tools: Prepare measuring tools such as depth gauges, angle gauges, or laser levels to check the drilling depth and installation angle.
3. Strictly control the drilling quality
Drilling depth: The drilling depth should be consistent with the effective anchoring length of the anchor. Drilling too deep may cause the anchor to not fully expand, while drilling too shallow may affect the bearing capacity. Use a drill bit or depth gauge with a depth scale to control the drilling depth.
Drilling diameter: The drilling diameter must match the anchor specification. Drilling diameter that is too large or too small will affect the fixing effect of the anchor. It is recommended to use a special drill bit and measure the diameter with a caliper after drilling.
Drilling angle: The drilling should be perpendicular to the surface of the substrate to avoid tilting. Use a laser level or angle ruler to assist drilling to ensure that the drilling angle meets the design requirements (usually 90°).
4. Precautions during installation
Screwing depth: The screw-in anchor needs to be screwed in to the designed depth to ensure that the inverted cone part of the anchor is fully expanded and fits tightly with the substrate. Use a depth gauge to check the screw-in depth.
Screwing angle: The anchor should be kept perpendicular to the surface of the substrate during installation to avoid tilting. Use an angle ruler or laser level to assist installation and ensure that the screw-in angle meets the requirements.
Screw-in force: The screw-in force should be moderate to avoid excessive screwing that may damage the anchor bolt or crack the substrate. It is recommended to use a torque wrench to control the screw-in force to ensure that the screw-in force is within the range specified in the product manual.
5. Inspection and verification after installation
Appearance inspection: Check whether the anchor bolt is installed in place and whether the surface is damaged or deformed.
Bearing capacity test: After installation, the pull-out tester can be used to pull the anchor bolt to verify whether its bearing capacity meets the design requirements. The pull-out test should be carried out in accordance with relevant standards to avoid damage to the substrate.
Non-destructive testing: When conditions permit, non-destructive testing methods such as ultrasonic testing can be used to check the screw-in depth of the anchor bolt and its combination with the substrate.
6. Quality control and acceptance
On-site quality inspection: During the installation process, on-site quality inspections should be carried out, including drilling depth, installation angle, screw-in depth, and screw-in force. For installation points that do not meet the requirements, rectification should be carried out immediately.
Acceptance criteria: According to the engineering design documents and relevant specifications, formulate the acceptance criteria for anchor bolt installation. The appearance, installation depth, angle and bearing capacity test results of the anchor bolt should be checked during acceptance.
Recording and archiving: The inspection records and test results during the installation process should be archived for subsequent traceability and quality control.
7. Handling of special situations
Substrate quality: If the substrate has quality problems such as cracks and looseness, corresponding reinforcement measures should be taken before installing the anchor bolt.
Environmental factors: When installing anchor bolts in a humid or corrosive environment, anti-corrosion measures should be taken, such as using anti-corrosion coatings or selecting corrosion-resistant anchor bolt materials.
Example operation process
Preparation:
Check the anchor bolt specifications and design requirements.
Prepare special tools (electric screwdriver, torque wrench, depth gauge, angle gauge, etc.).
Drilling:
Use a special drill bit to drill holes in the substrate, and the depth and diameter meet the design requirements.
Use a depth gauge and an angle gauge to check the drilling quality.
Install anchor bolts:
Screw the anchor bolts into the drilled holes, use a torque wrench to control the screw-in force, and ensure that the anchor bolts are fully expanded and anchored.
Use a depth gauge and an angle gauge to check the screw-in depth and angle.
Quality inspection:
Perform visual inspection and pull-out test on the installed anchor bolts.
Rectify anchor bolts that do not meet the requirements.
Acceptance:
Accept the installation quality according to the acceptance standards to ensure that the anchor bolt installation meets the design requirements.
Contact Us